For the past few years, I’ve been designing scavenger hunt parties for my daughter’s birthday party. This was originally born out of her love for Gravity Falls and all the secret codes throughout that show. So far I’ve made parties for Gravity Falls, Warriors (the cat books, not the colorful gangs), and Yo-kai Watch. This year it was time for everyone’s favorite pandemic obsession – Animal Crossing!
Due to the pandemic, we could not have an actual birthday party with her friends, so I decided to go the extra mile and make this party special (maybe too special, more on that in the summary). Also, my girlfriend’s daughter is 6 years younger than my daughter but I wanted to make sure she was included.
THE SET UP
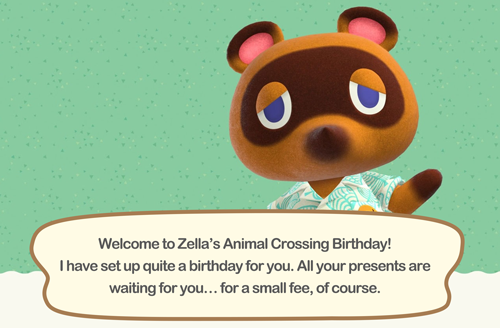
There’s a whole new game – it’s Animal Crossing: Birthday Island. My daughter was greeted with this card.
THE PLANNING
Wait, before I get ahead of myself, let me talk about the massive amount of planning that went into this. I knew a few things I want to accomplish:
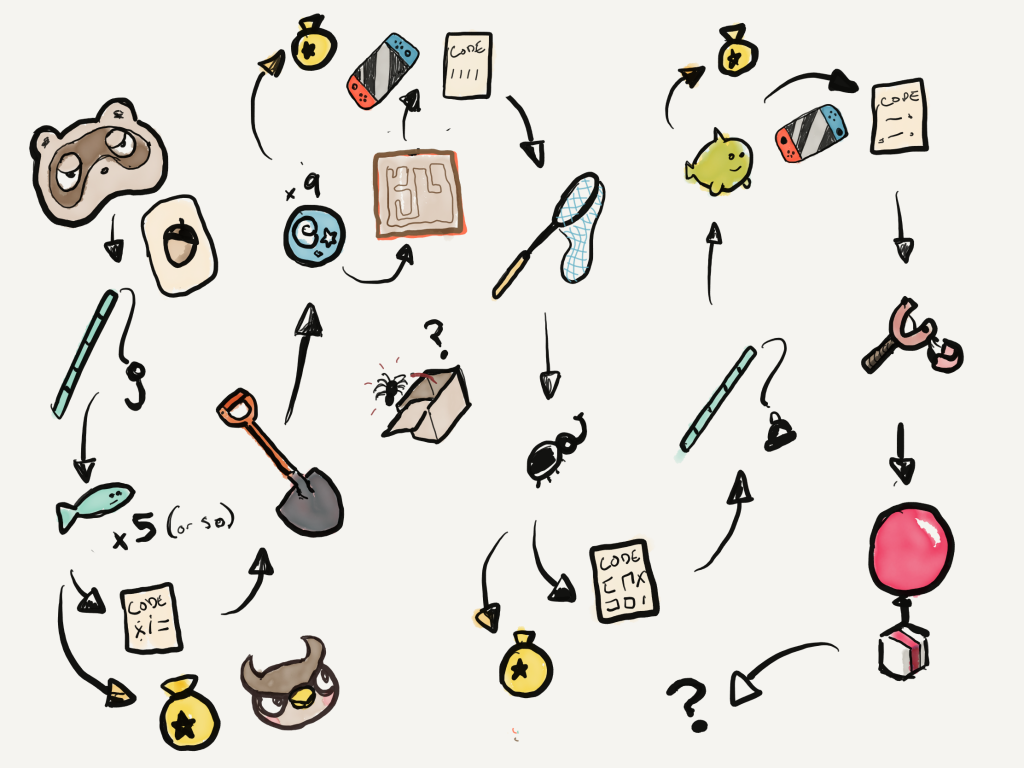
- Use the tools from Animal Crossing in real life (IRL).
- Have IRL parts of the scavenger hunt and parts *in* the Animal Crossing game.
- Harder puzzles for the 12yo and easier puzzles for the 6yo so they could work together.
I sketched and planned over and over (using Paper by 53 in my iPad)
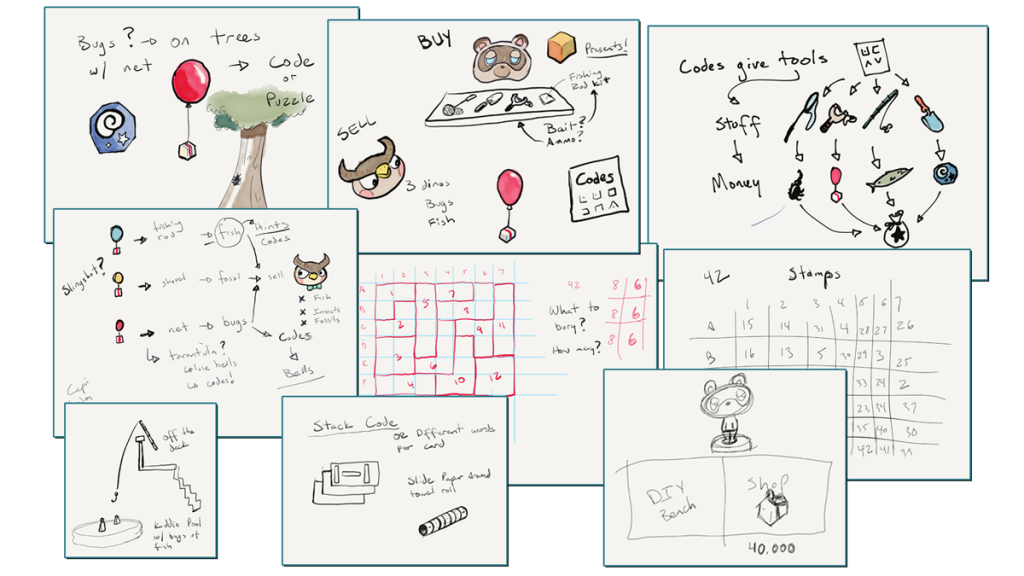
After a couple weeks of planning off and on, I settled on this flow and started filling in the gaps with puzzles and activities.
back to THE GAME
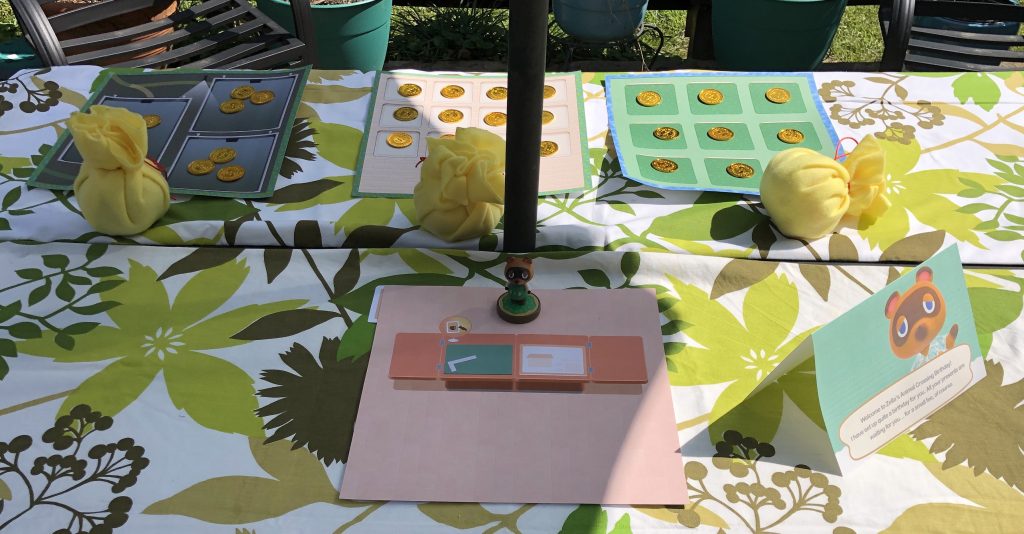
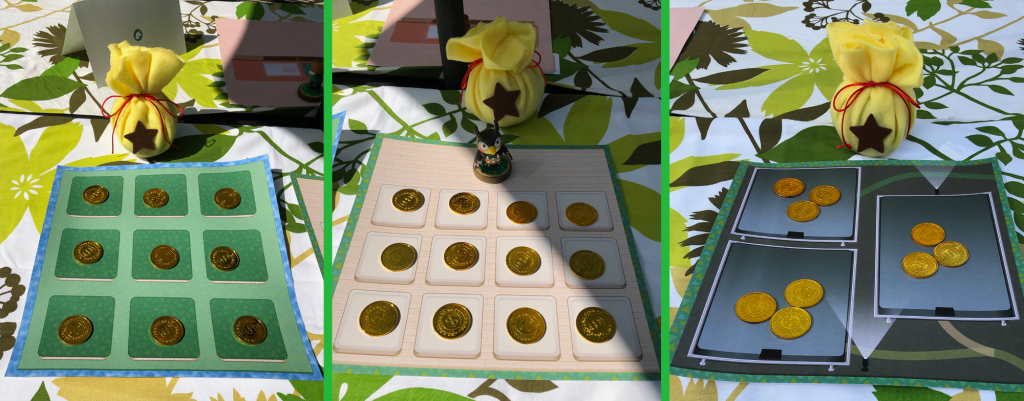
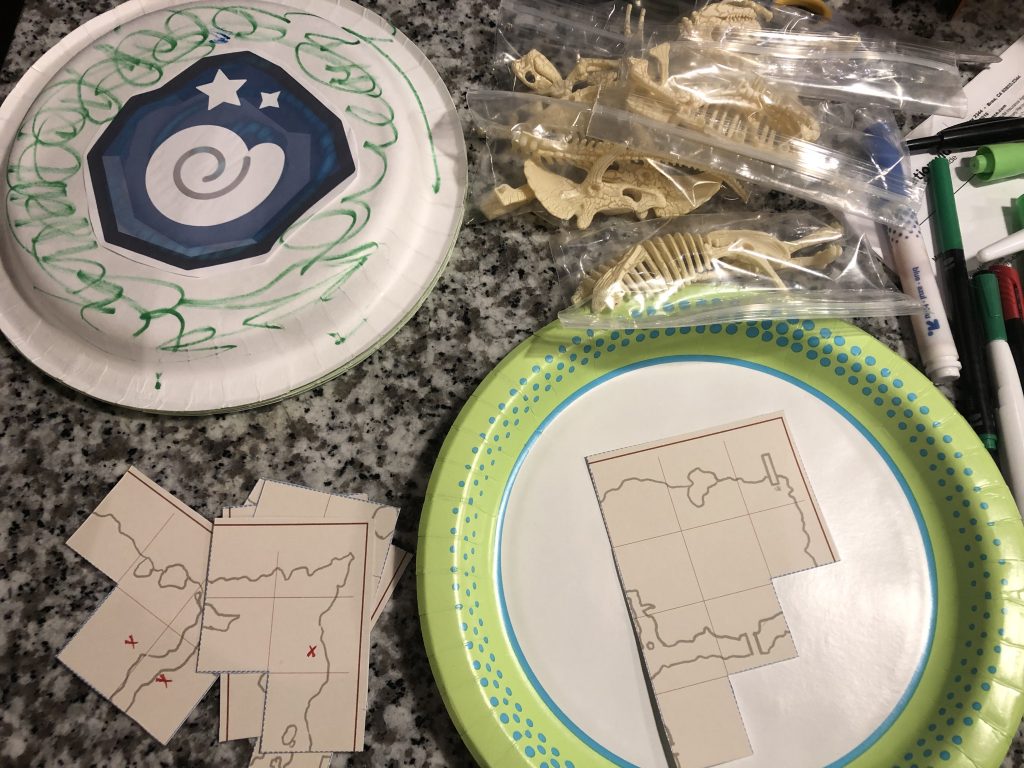
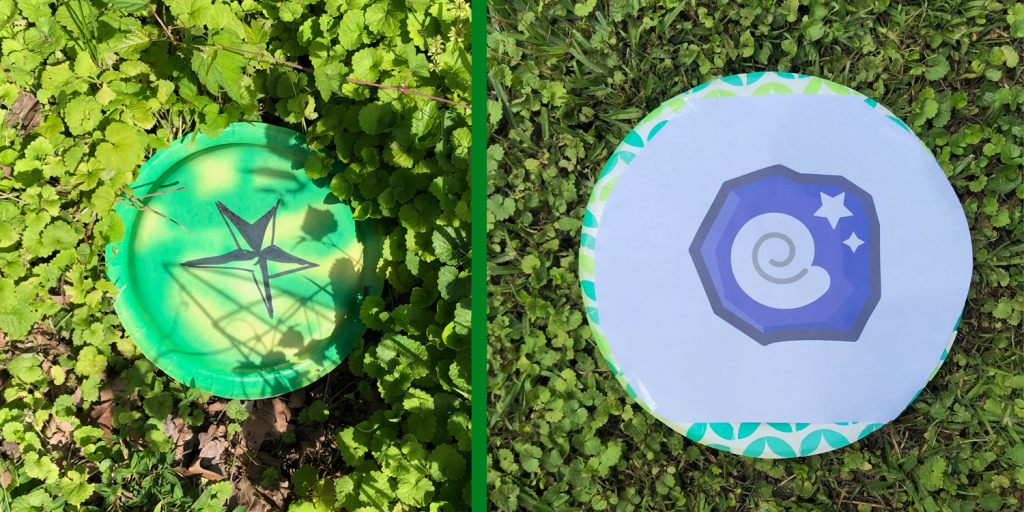
I designed and printed mats to emulate Resident Services and The Museum. Amiibos of Tom Nook and Blathers were manning their respective areas and guarding the horde of Bells. These Amiibos were the first small presents of the day.
THE RULES
- Each coin is worth 100 Bells
- Finding a bug/fish/fossil grants you the coin(s) from the space
- Hints are 500 Bells
- Filling entire museum section grants 10k Bells (the bags of Bells)
- You must follow the tool rules! No catching bugs without a net, no fossils without a shovel, etc.
- The birthday presents cost 40k Bells!
- Getting the last 10k Bells is a secret and must be discovered!
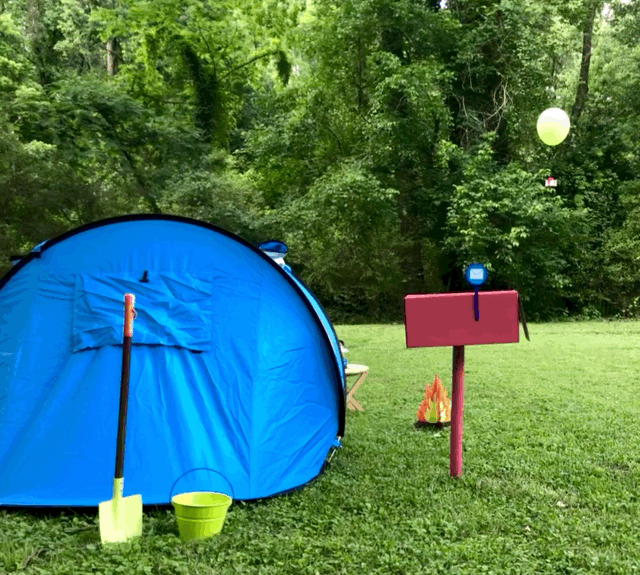
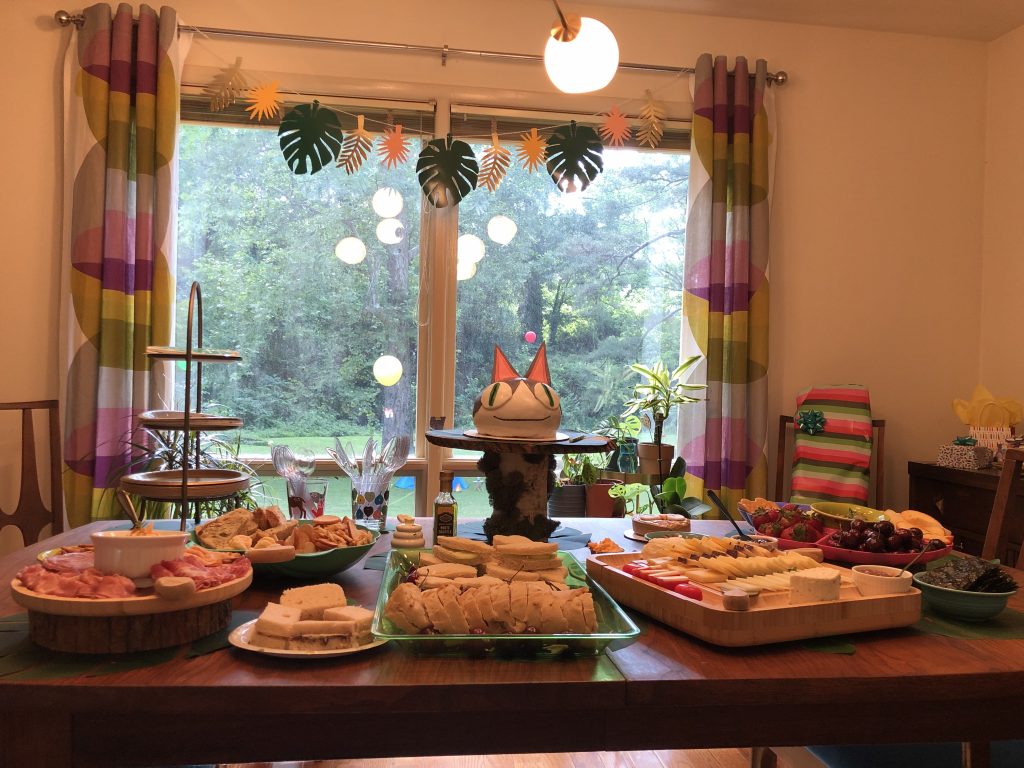
The back yard was decorated with tents, mailboxes, campfires, and even real floating balloons with presents hanging from them! In addition to hosting, my wonderful girlfriend did an excellent job with the decor both in and out of the house!
FISHING
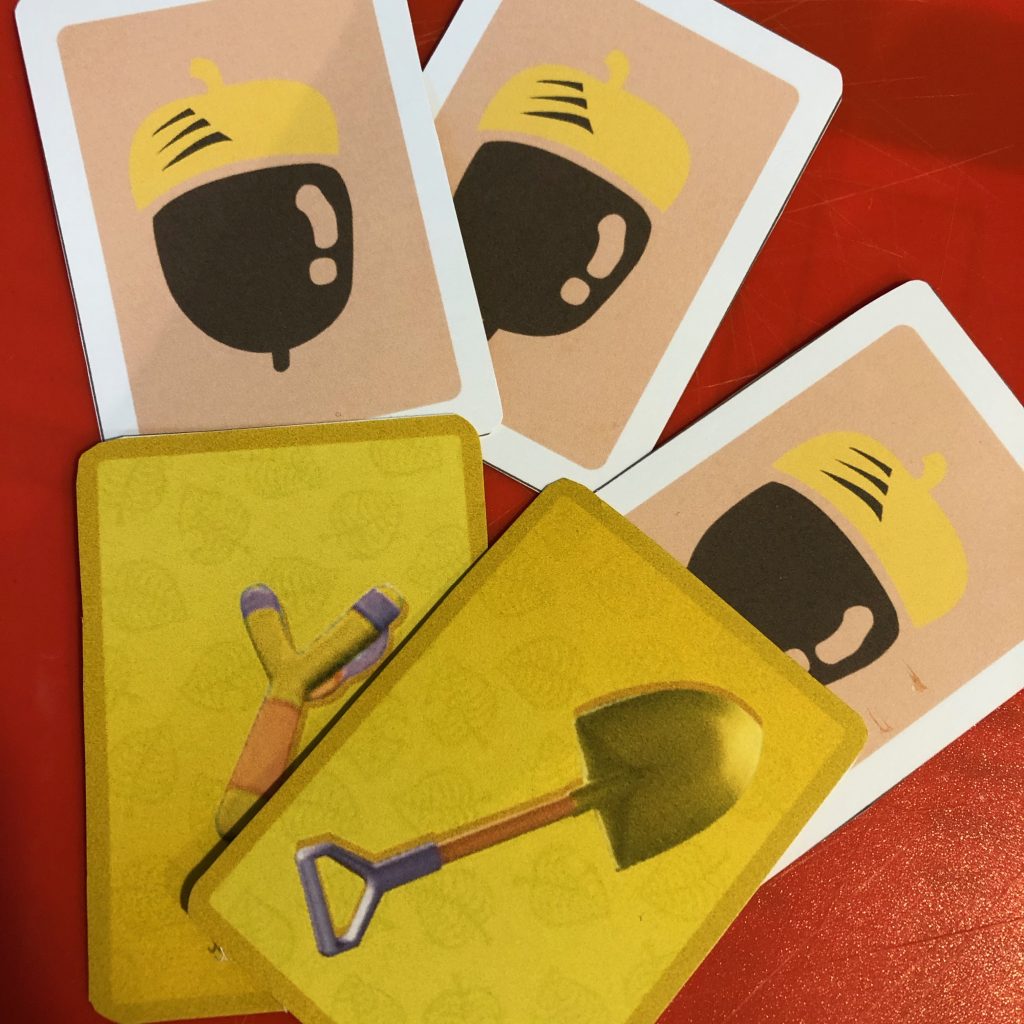
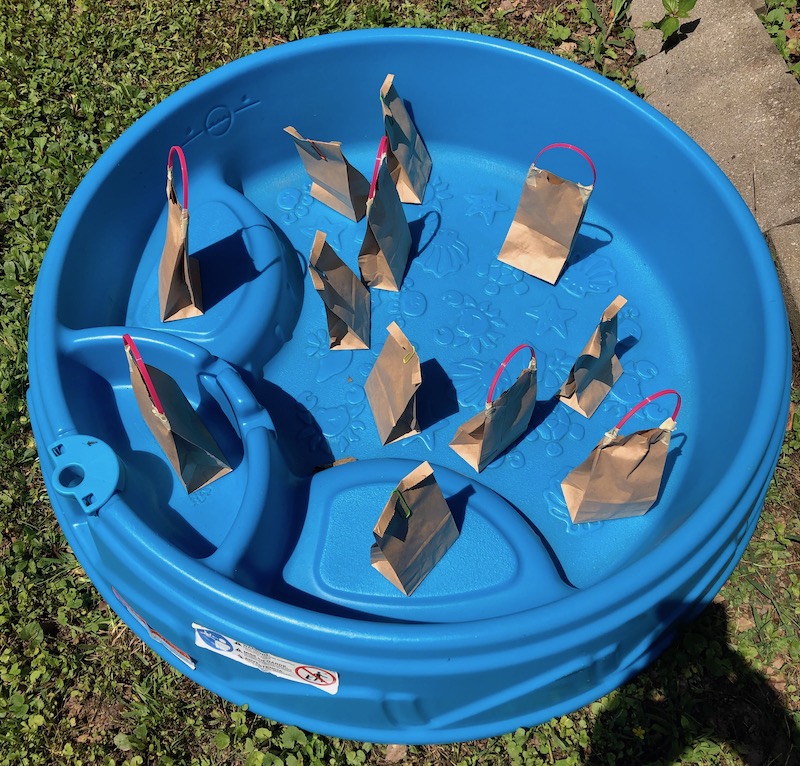
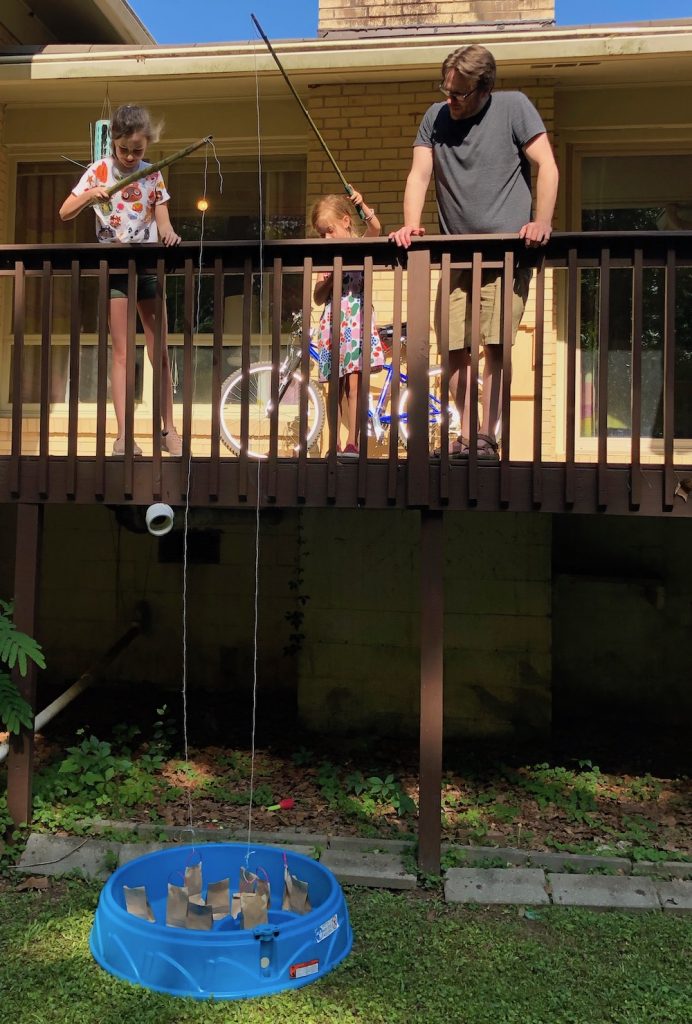
The girls were given the first DIY Card for free – fishing rods. They had to solve puzzles and catch critters to find the rest of the DIY cards. They were also given some bamboo, string, and hooks made from wire coat hangers to assemble their fishing poles.
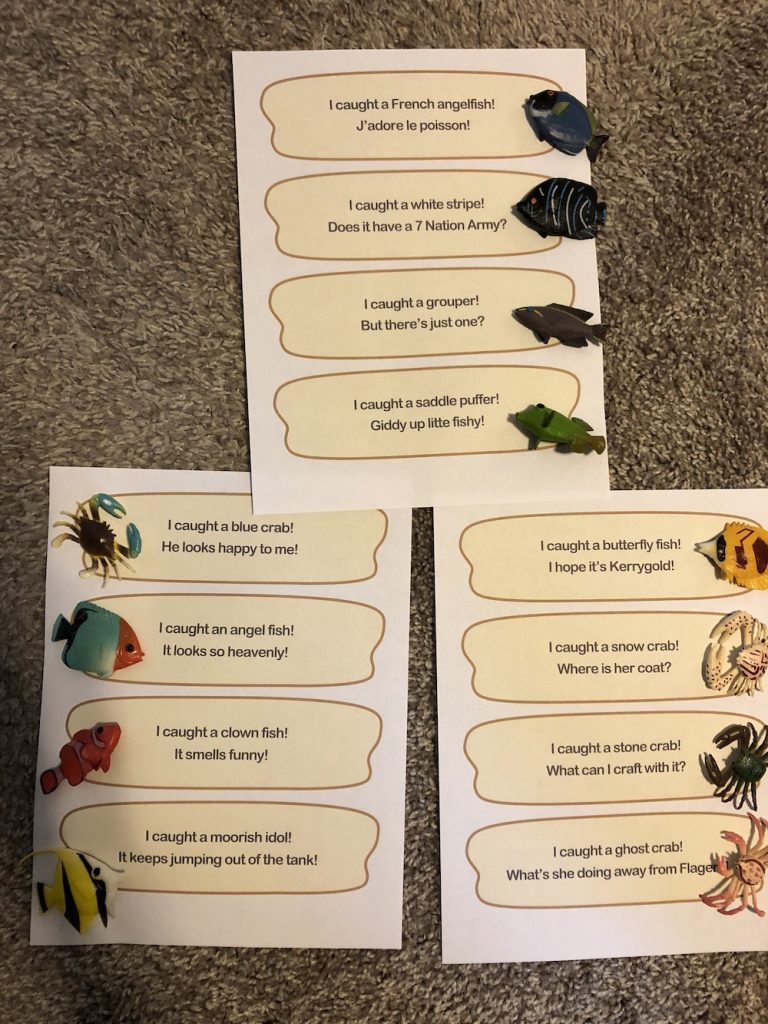
I put little toy fish, some bad puns, and pieces of a 6-part puzzle in little paper bags. They had to get all the cards and stack them to reveal the code. Half the bags had big hook-able rings, the other half had paperclips only (for the future fishing rod upgrade). Six fish means 600 Bells and the fish area of the museum half-way filled up!
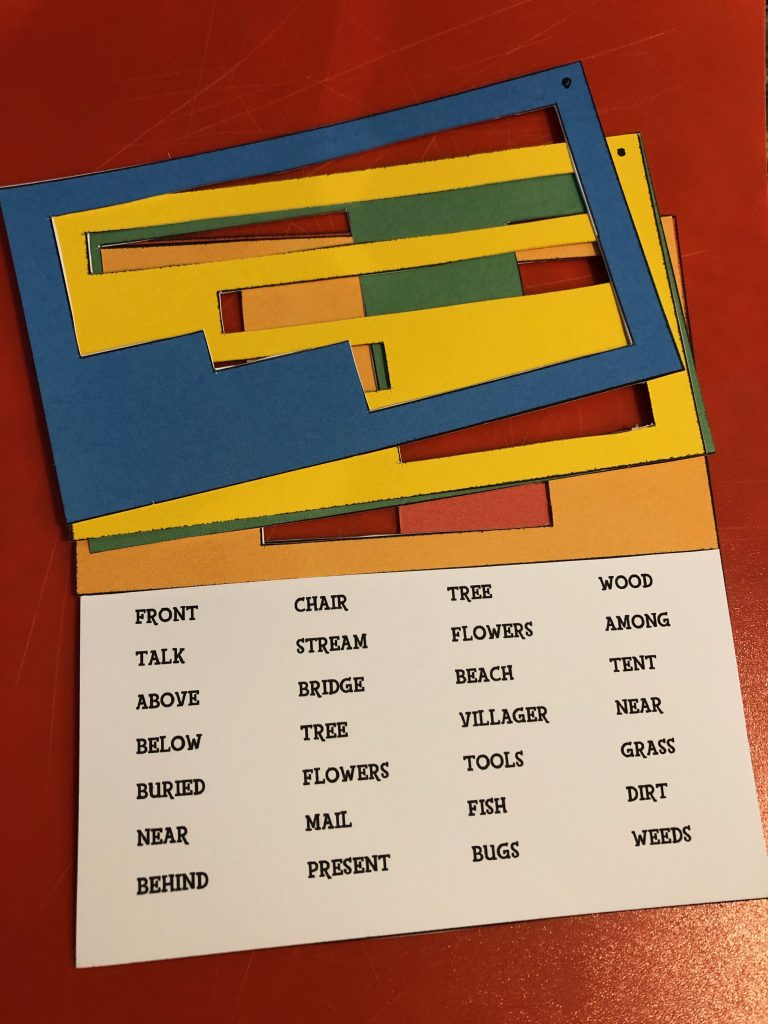
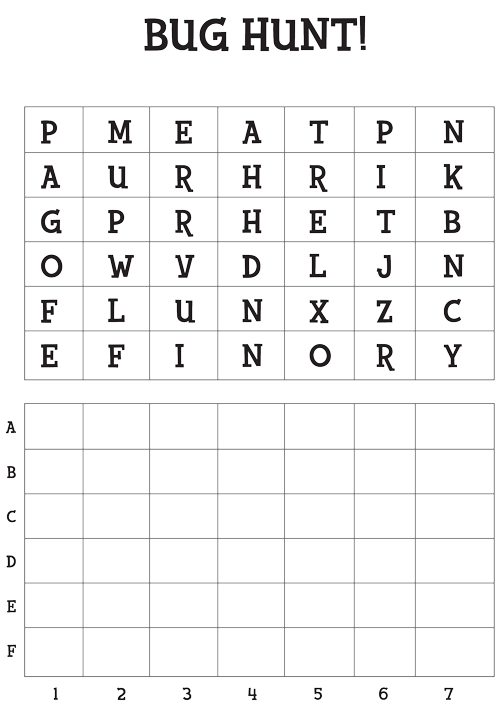
I used Discovery Kids Puzzle Maker to create a word search for the younger girl that revealed a clue “STACK THE CARDS”. After stacking the cards correctly, the puzzle solution revealed to be “FLOWERS FRONT HOUSE” written in the Animal Crossing font, which meant the next clue was in the game!
I made this set up as a clue to where the next DIY card was hidden in the real world. You see that DIY card hiding behind the far-left flower?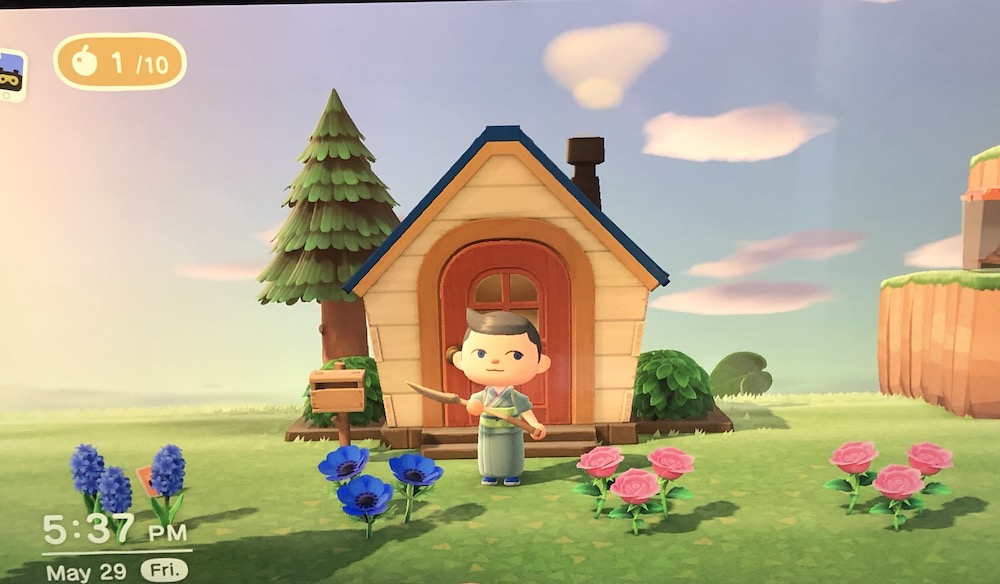
Behind the IRL house are some big, decorative metal flowers with the same color arrangement. The next DIY Card was taped behind the corresponding flower. The next tool was the shovel!
FOSSILS
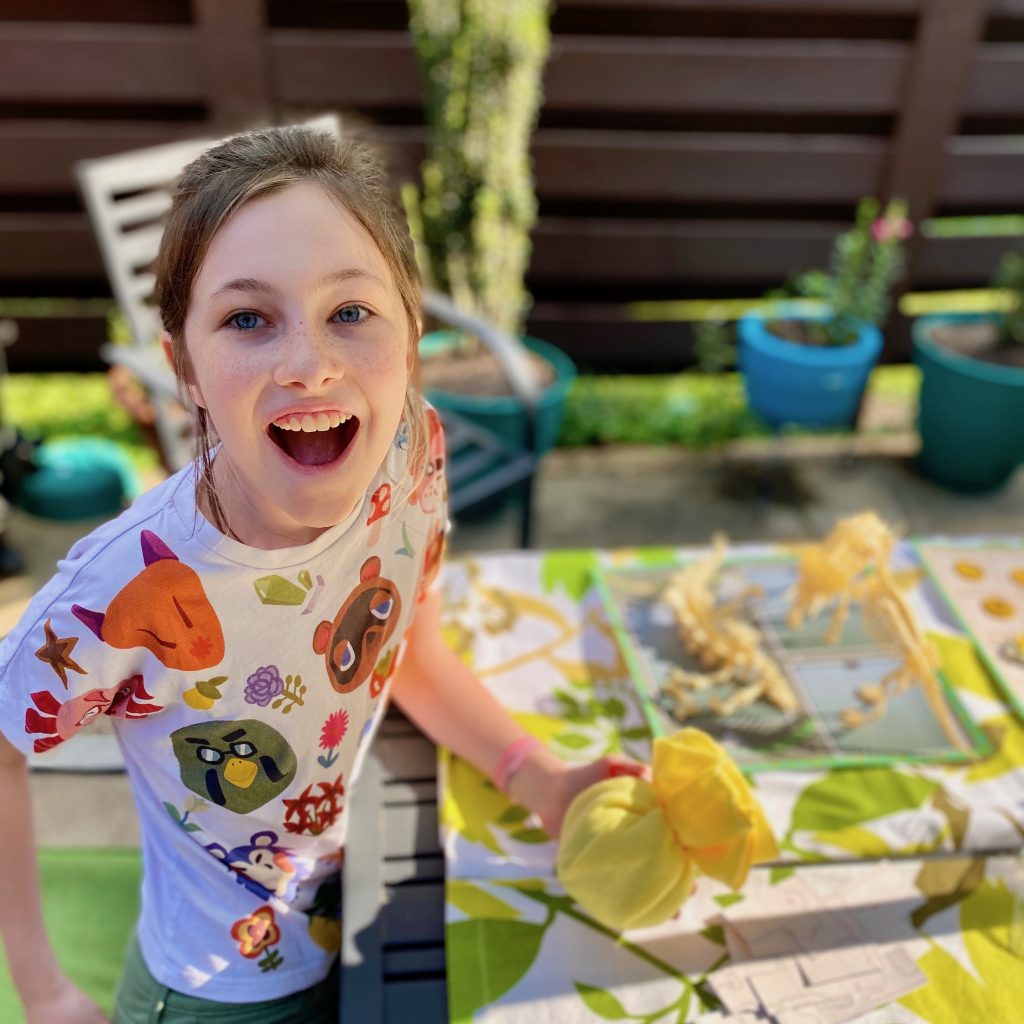
I ordered this dinosaur skeleton set on Amazon. I divided the skeletons up into 9 groups, along with a puzzle piece. I painted back of some deep paper plates to look like the little “dig spot” from Animal Crossing and taped printouts over the mouth of the plates to hold everything in, so the girls had to rip them open to get to the goodies.
She had to assemble the dinosaur models to get the full 10k Bell credit from the museum. I have to admit, my mixing the dinosaur bones up made this overly difficult but she completed the fossils for her first bag-o-bells!
Along with each fossil was a piece of a roughly drawn treasure map. Once she put it together, it was clearly her Animal Crossing Island! She had it comically upside-down at first before she recognized it!
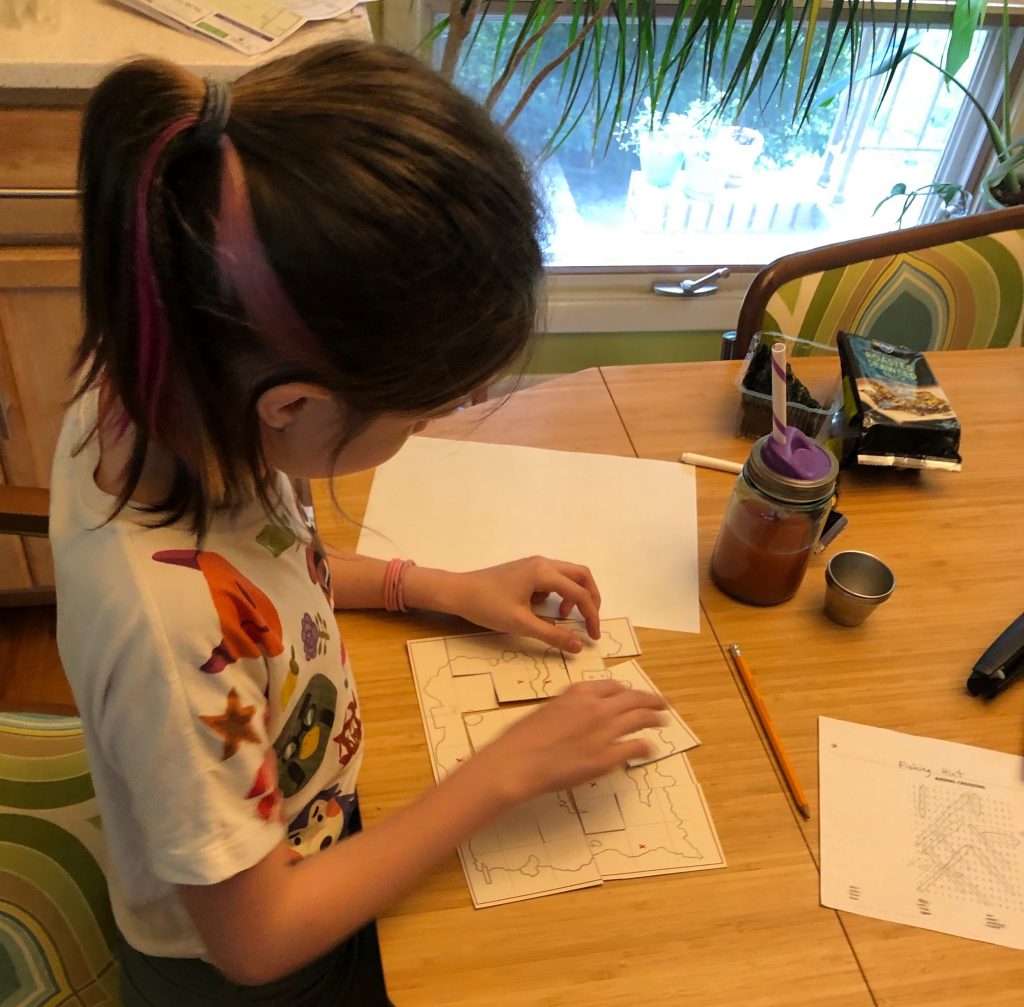
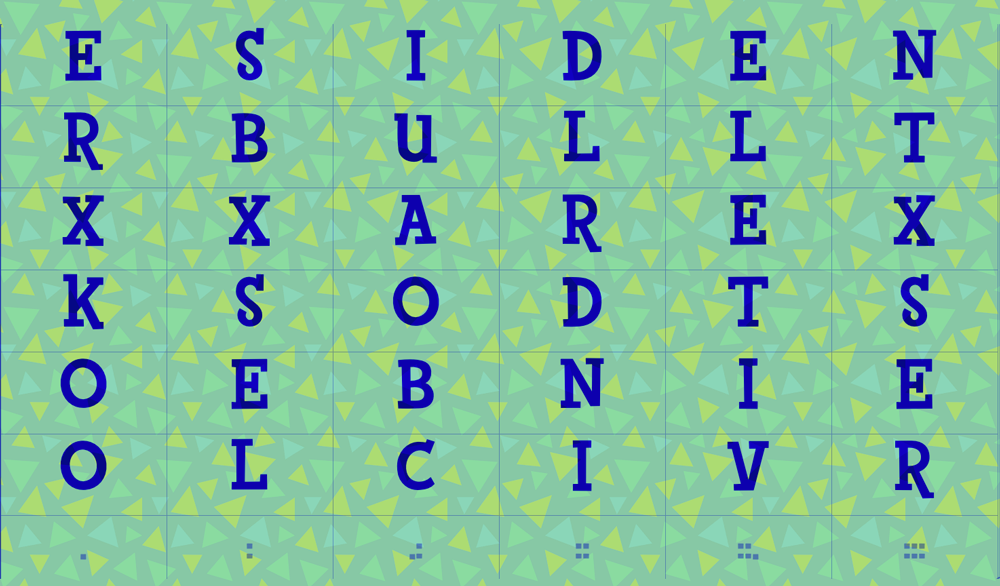
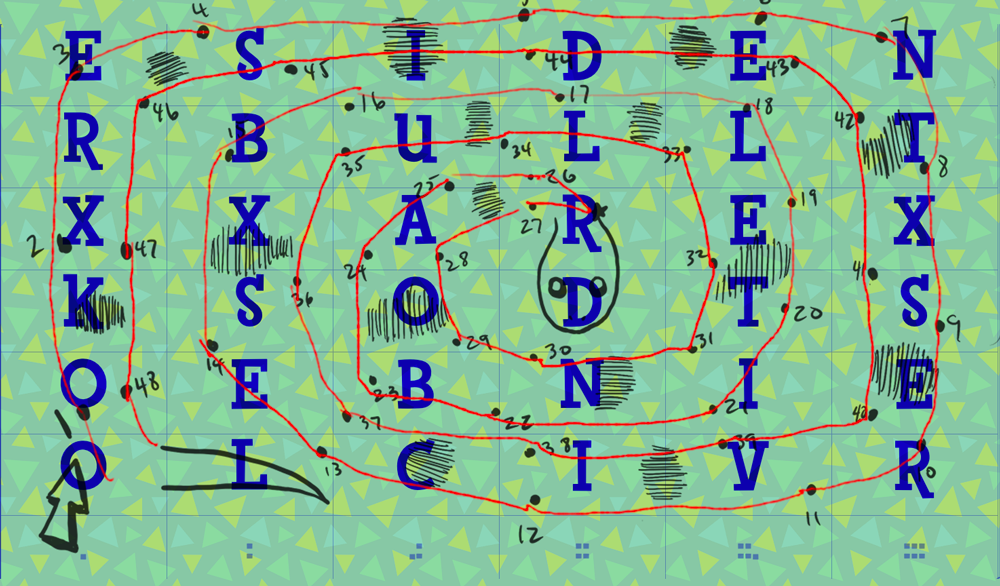
Buried in the Animal Crossing game, at each marked spot, was an item. I told her to carefully track which grid (A1 – F7) she found each item and its exact name. The names and locations of the items, paired with the maze below (for the younger girl), revealed the next clue. The correct path of the maze outlined the right sequence of grid and letter.
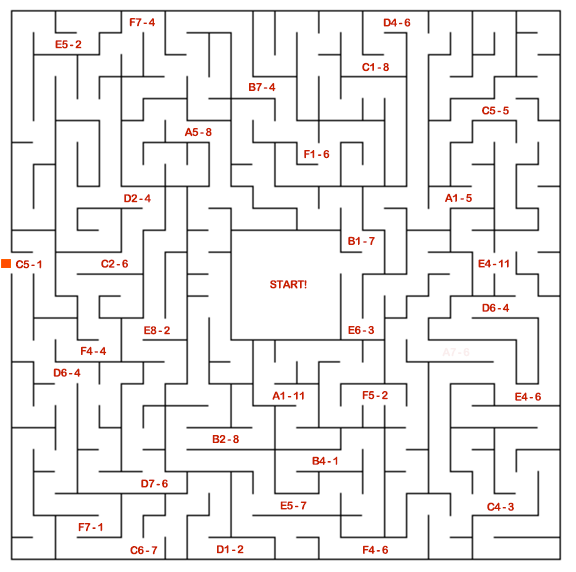
- B1-7 (sand doLlar)
- B7-4 (corAl)
- F7-4 (wooD)
- D2-4 (claY)
- C2-6 (tree Branch)
- F4-4 (venUs comb)
- C5-1 (Gold Plaque)
Ladybug? Let’s go look outside for the next DIY card!
BUGS
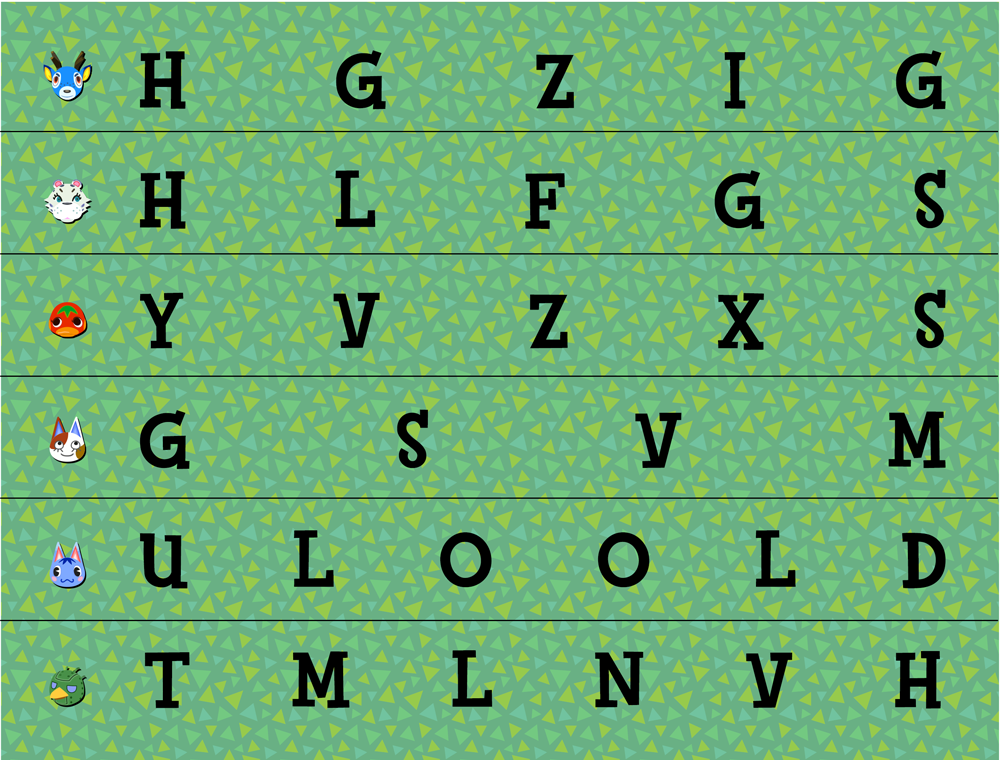
The net DIY Card was hidden under a decorative ladybug in the back yard. Nine little toy bugs were hidden (too well) in the back yard. Another 10,000 Bells for completing a museum section! Each bug had a few letters painted on the bottom. Arranging all the bugs in alphabetical order revealed the next in-game code – COUNT THE BUGS BY GRID
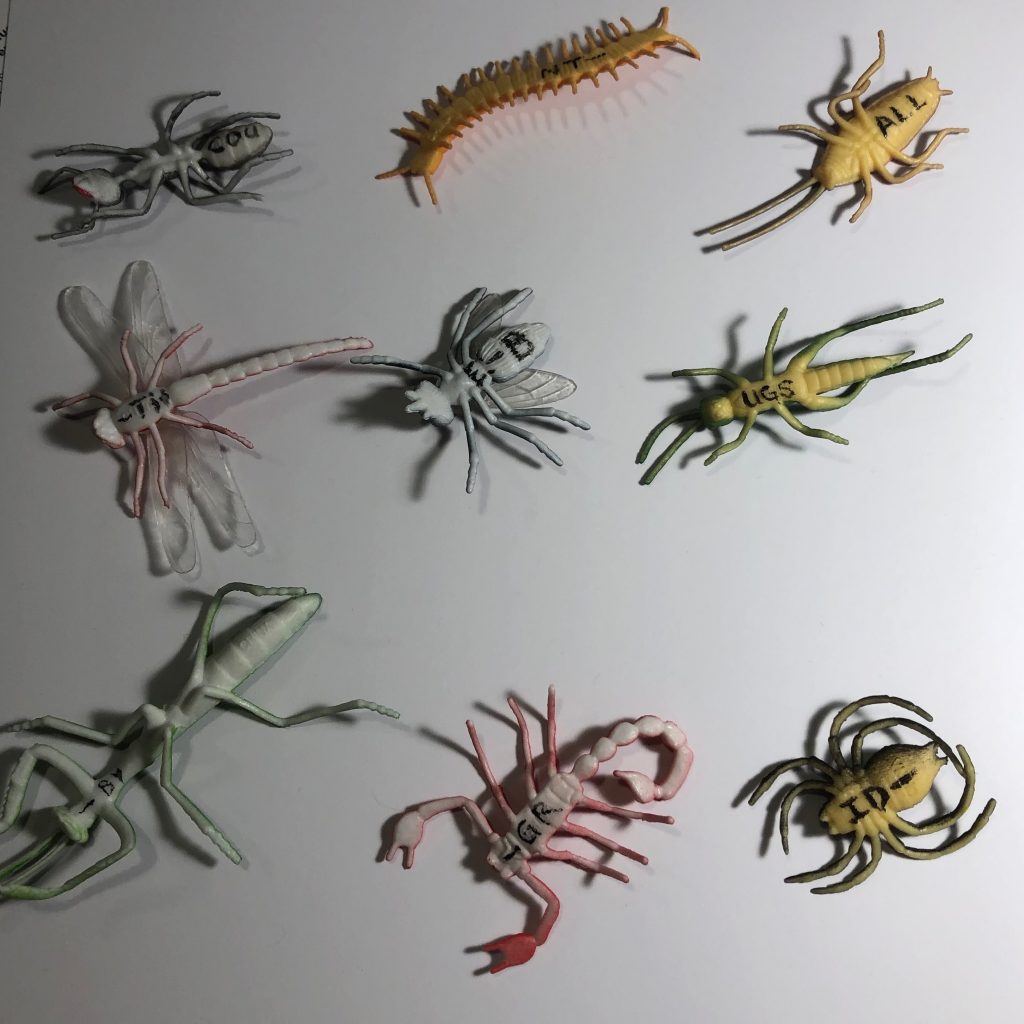
Oh yeah, there was also a hint tarantula, if you didn’t have the Bells for a hint.

With the Animal Crossing design tool, I made a few bug stamps (1 bug, 3 bugs, 5 bugs) and stamped the ground with a number of bugs. The count of the bugs on the grid corresponded to another puzzle grid.
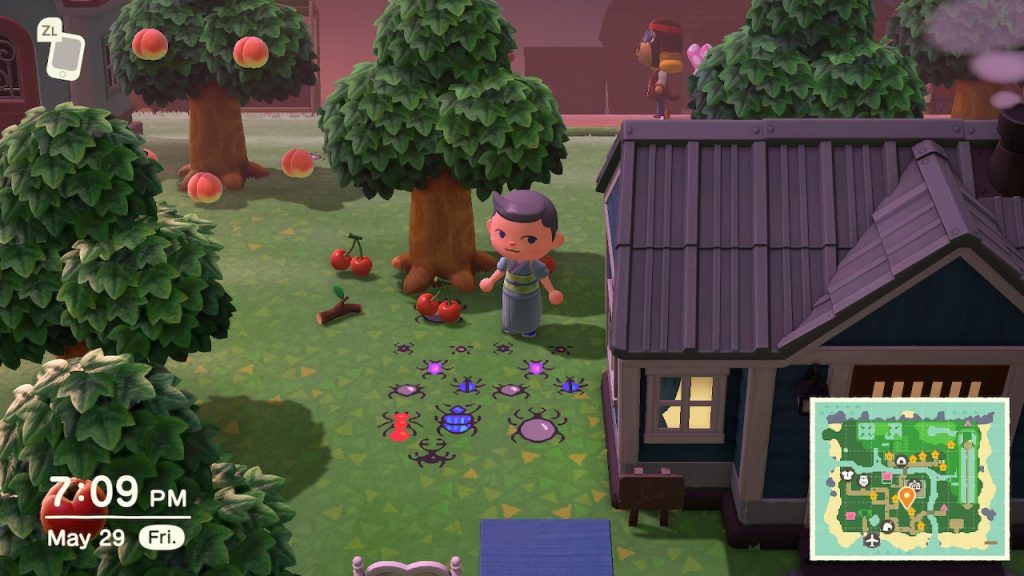
The count of the bugs by the grid revealed the code revealed UNDER TRAMPOLINE, which is where the Fishing+ DIY card was held!
FISHING+
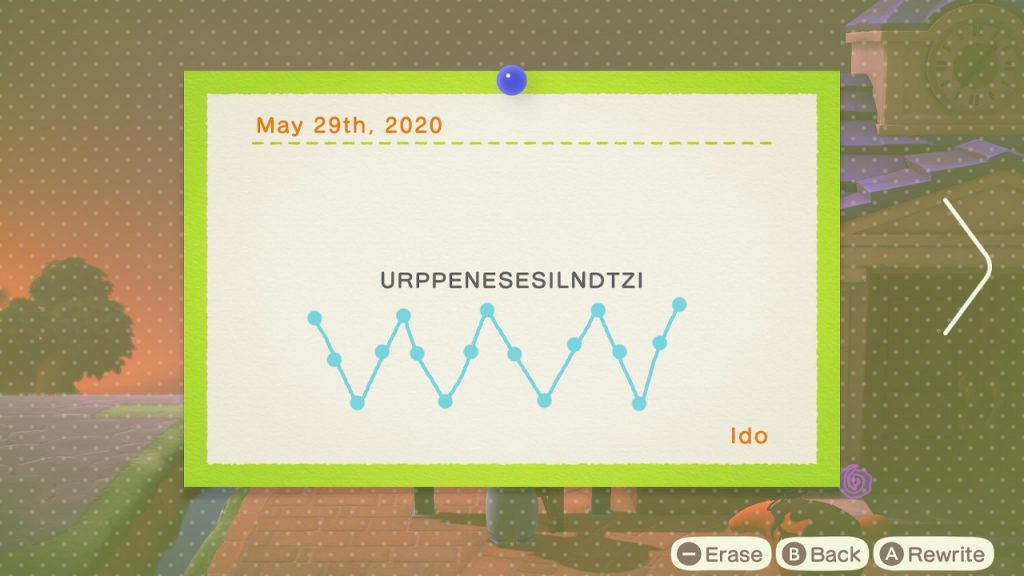
This time for fishing they had little magnet lures, so they could catch the rest of the fish! Another 6-part code (cut vertically, little dots at the bottom show the order it must be re-assembled) with another hint! This time a grid puzzle but the connect-the-dots puzzle reveals the path in which she had to follow to grid to get the answer (it’s just a swirl).

This revealed the code LOOKxRESIDENTxSERVICESxBULLETINBOARD.
On the Resident Services Bulletin Board in Animal Crossing, I put a zigzag (a.k.a. rail fence) puzzle. There was A LOT of confusion and frustration with this puzzle. I think there was also some “code fatigue” (more on that later in my summary), so I just gave the answer – UNDER STEPS ZIPLINE.
THE SLINGSHOT
This was (supposed to be) the ultimate fun end to the adventure! Shooting down real floating balloons and presents with a real slingshot! But the balloons had been sitting in the hot sun for about 3 hours and had deflated considerably, making them *very* difficult to pop. This led to a lot of frustration. It was a huge bummer. There were some tears.
We skipped this puzzle but here is. There was a 6-part Atbash puzzle in the boxes the balloons held. They were cut up horizontally and had to be put back together in alphabetical order of the Animal Crossing characters’ names.
This said START SOUTH BEACH THEN FOLLOW GNOMES, but I just told her the solution.
I had 3 gnomes pointing in a path around her island in Animal Crossing that eventually led to her mailbox, where there was a simple “skip every couple letters” to reveal the secret to getting the final 10,000 Bells – GIVE DADDY HUGS. Yes, very self-serving. I DESERVE IT!
EVERYONE WENT ALL OUT!
It wasn’t just me going nuts. Everyone involved in the party took it took to the extreme!
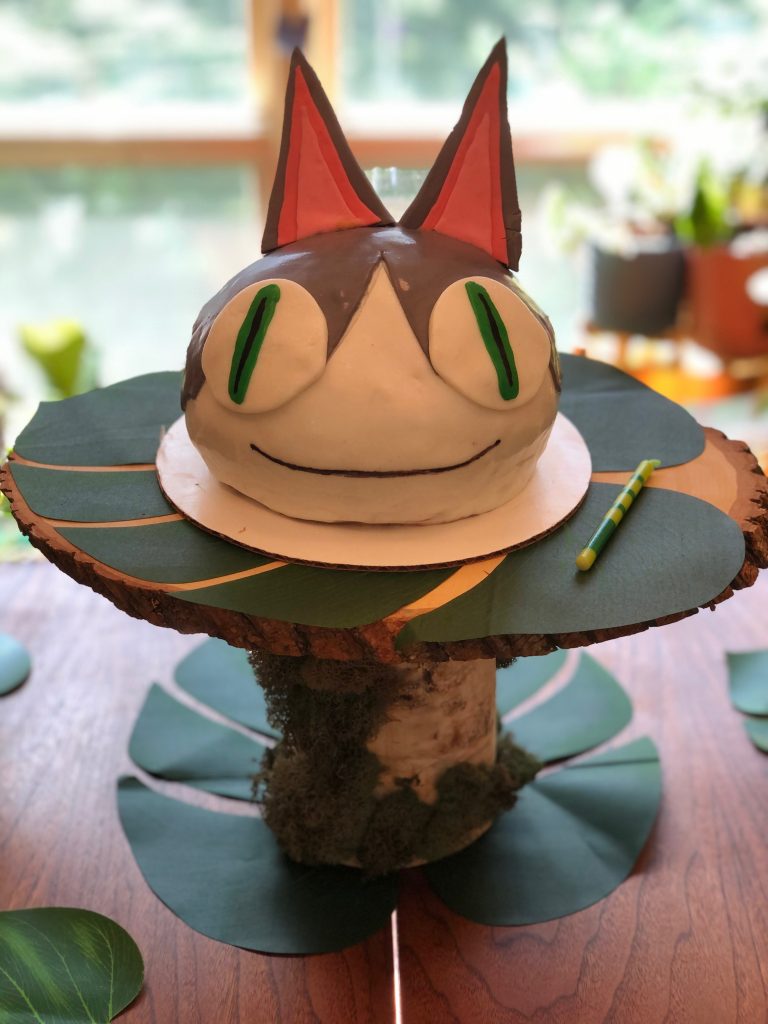
We had awesome decorations, and my daughter’s mom made a crazy spread of food. My girlfriend’s sister is a straight cake boss and made this amazing cake! The cake was mean to look like Punchy but colored like my daughter’s cat.
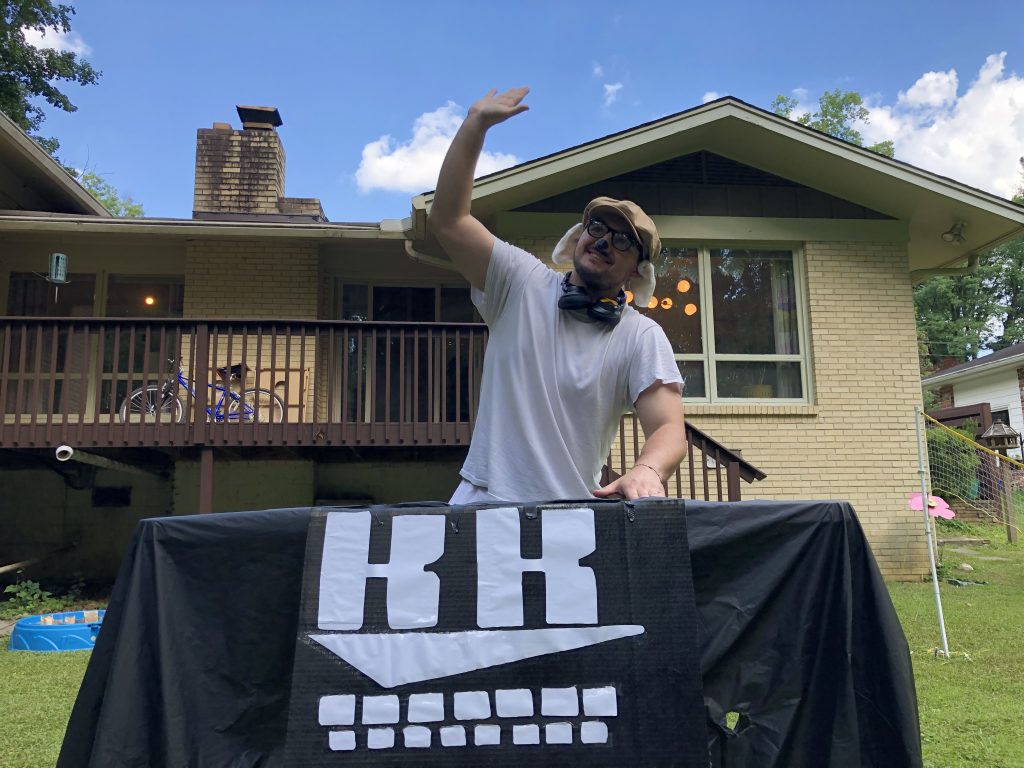
My ex’s boyfriend even dressed up like K.K. Slider and set up a DJ Booth (but it was really hot outside).
SUMMARY
All in all, a good time was had by the girls but I made some big mistakes.
Mistake #1 – I’m used to have 6-10 kids working on these puzzles. Their combined efforts tear through these puzzles quickly. Having all the puzzle solving on one kid by themselves was way harder and not as much fun. This meant the puzzle sections were taking a really long time and became a chore. Also, this just made the game take too long.
Mistake #2 – The balloons. Well before the party, I tested shooting the balloons with a slingshot and it worked like a dream. I could pop the balloons with no effort. However, I’m an older guy and had slingshots a good part of my childhood.
Now compare that to a kid who has never shot a slingshot and is shooting at deflated balloons. It was a recipe for frustration.
Hopefully next year we won’t be under quarantine and my daughter can have a group of friends take part in the puzzles. I already have my eye on a 3D printer to make physical puzzles for next year!